The Importance of pH Testing Your Water-Based Skincare Products
Are you making your own skincare products at home? Whether you're whipping up a simple toner, serum, or lotion, one key step you shouldn't skip is checking the pH level. pH testing helps ensure your creations are safe and effective for your skin. In this blog, we'll explain what pH is, why it matters for water-based skincare, how to test it, and simple ways to adjust it if needed. Let's keep things straightforward so you can confidently create products that nurture your skin.
What Is pH and Why Does It Matter?
pH stands for "potential of hydrogen" and measures how acidic or alkaline a substance is on a scale from 0 to 14. A pH of 7 is neutral, like pure water. Below 7 is acidic, and above 7 is alkaline. Your skin naturally has a slightly acidic pH, typically around 4.5 to 5.5. This acidity forms a protective barrier that keeps out bacteria, locks in moisture, and maintains overall skin health.
When skincare products have a pH that's too high or too low, they can disrupt this natural balance. This might lead to irritation, dryness, breakouts, or even weaken your skin's defenses over time. For water-based products like toners, essences, or hydrating serums, pH is especially important because they often contain mostly water and active ingredients that interact directly with your skin.
Why Test pH in Water-Based Skincare Products?
Water-based skincare products are popular in DIY routines because they're lightweight and easy to make. But without proper pH testing:
- They Might Irritate Your Skin: A product that's too alkaline (high pH) can strip your skin's natural oils, causing dryness or redness.
- Actives Could Lose Effectiveness: Ingredients like vitamin C or hyaluronic acid work best at specific pH levels. If the pH is off, they might not deliver the benefits you expect.
- Bacterial Growth Risk: Products with a pH outside the safe range (usually 4-6 for skincare) can become a breeding ground for microbes if not preserved properly.
- Long-Term Damage: Repeated use of imbalanced products can compromise your skin's barrier, leading to sensitivity or premature aging.
Testing pH ensures your homemade products are gentle, effective, and tailored to your skin's needs. It's a simple way to avoid common pitfalls and achieve professional-like results. A good practice is to always pH adjust your water base before you start adding other ingredients—it's an excellent starting point to build a balanced product from the ground up.
Simple Instructions: How to Test pH
Testing pH at home is easy and doesn't require fancy equipment. Here's how:
- Gather Your Tools: You'll need pH test strips (available online or at pharmacies) or a digital pH meter for more accuracy. pH strips are affordable and beginner-friendly. Also, have distilled water on hand if your product is thick.
- Prepare Your Sample: For liquid products, use them as is. If the product is creamy or viscous, dilute a small amount (about 10%) with distilled water to make testing easier. Stir well.
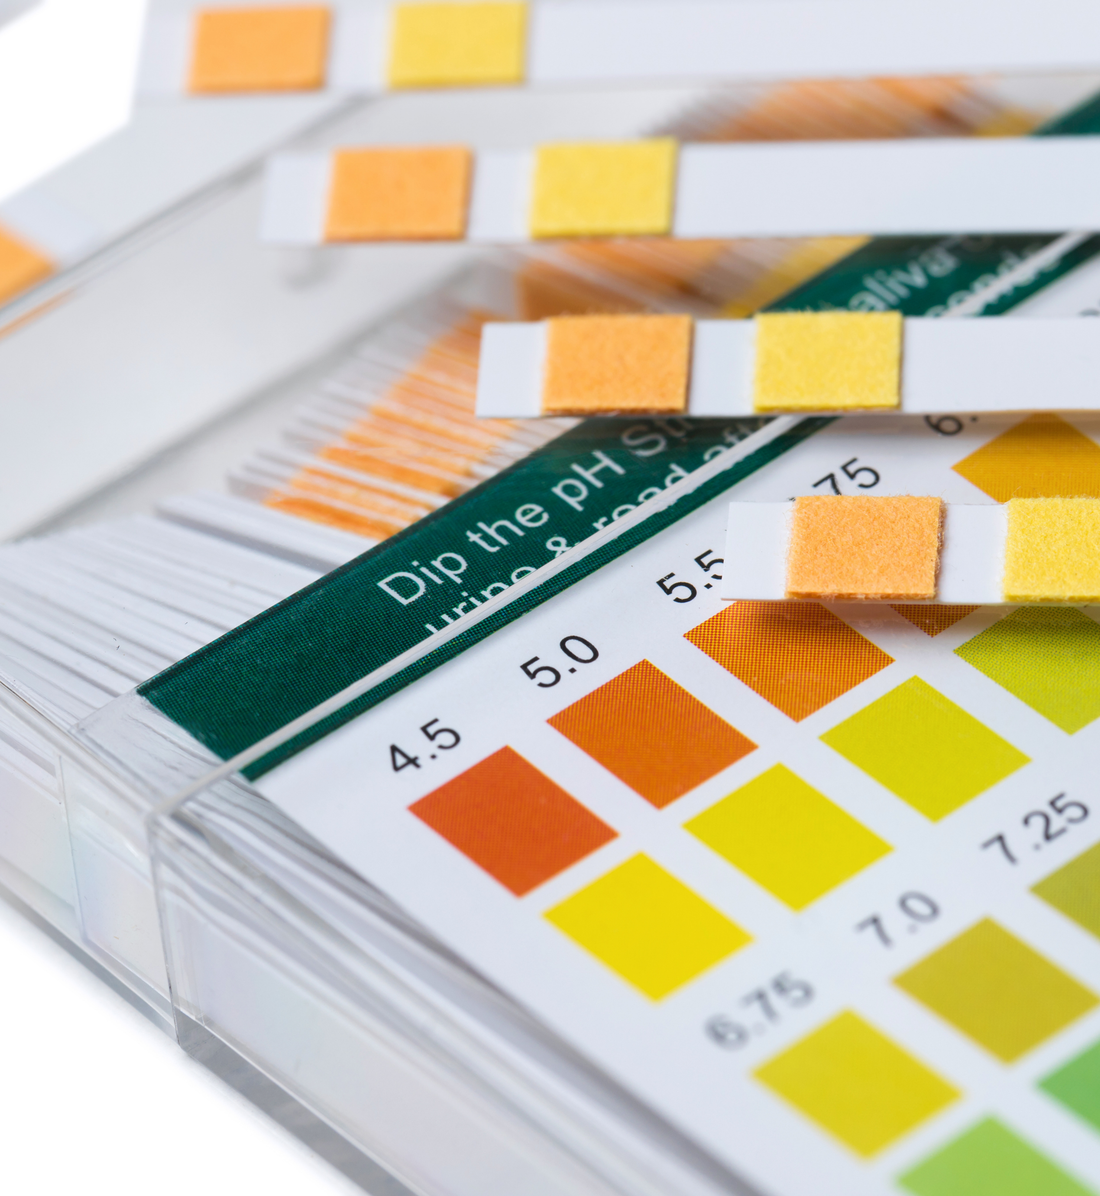
- Test It: Dip a pH strip into the sample for a few seconds, then compare the color to the chart on the package. For a meter, calibrate it first (follow the instructions), then insert the probe into the sample and read the display.
- Record and Repeat: Note the pH. Test multiple times for consistency, especially after making adjustments.
Aim for a pH between 4.5 and 5.5 to match your skin's natural level.
Simple Instructions: How to Adjust pH
If your product's pH is off, you can fix it with safe additives. Always work in small batches and wear gloves for safety. Start by adjusting the pH of your water base before incorporating other ingredients to keep things simple and controlled.
- To Lower pH (Make More Acidic): If the pH is too high (above 6), use a citric acid solution. Prepare a 10-20% citric acid solution in distilled water, then add it drop by drop to your mixture. Start with very small amounts (e.g., 0.1% of your product's weight), stir well, and retest. Add more gradually if needed.
- To Raise pH (Make Less Acidic): If the pH is too low (below 4), you can use sodium bicarbonate (baking soda) or a very diluted sodium hydroxide solution. However, raising pH comes with significant risks—if you mess it up, strong bases like sodium hydroxide can cause severe burns to your skin or eyes. Always wear protective gear, such as gloves, goggles, and long sleeves, when handling these. Start with tiny amounts (0.1%) dissolved in water, mix thoroughly, and test again. Proceed with extreme caution, and if you're inexperienced, consider avoiding strong bases altogether.
Pro Tip: Make changes slowly—add, stir, wait a few minutes, then test. If you over-adjust (e.g., make it too acidic or too alkaline), it's safer to start over with a fresh batch rather than trying to correct it further, as repeated adjustments can introduce instability or contamination. Over-adjusting the water base early on is especially easy to fix by simply preparing new water.
Tips for Success and Safety
- Test at room temperature for accurate readings.
- Store your products in airtight containers to prevent pH shifts over time.
- If you're new to DIY, start with simple recipes and consult reliable sources.
- Always do a patch test on your skin before full use, even if the pH is perfect.
- Remember, pH testing is crucial, but it's not a substitute for proper preservation to prevent spoilage.
Conclusion: Empower Your Skincare Routine
pH testing and adjusting might sound technical, but it's a straightforward way to make your water-based skincare products safer and more effective. By keeping your creations in harmony with your skin's natural pH, you'll enjoy healthier, happier skin without the guesswork. Give it a try in your next DIY project—you'll see the difference!
Call to Action: Ready to level up your homemade skincare? Try pH testing your next batch and share your results in the comments. For more simple skincare tips, subscribe to our newsletter and follow us on social media.